
word 姓名標籤
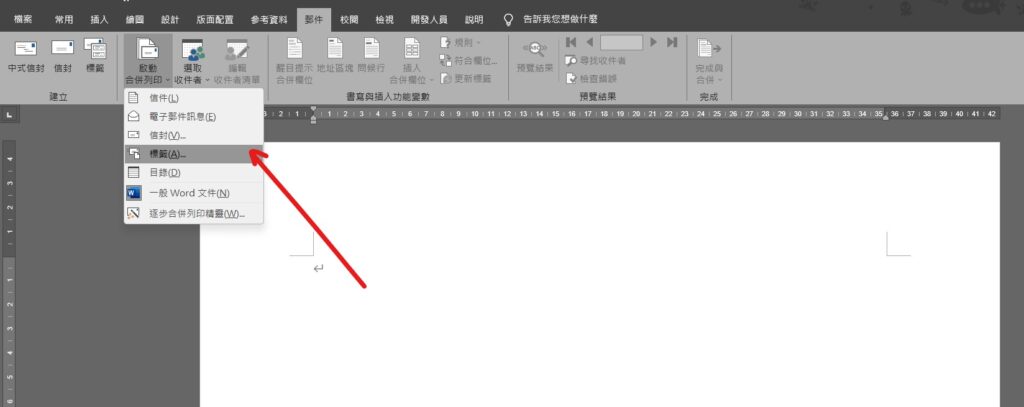
Step 1 在功能列「郵件」中啟動合併列印選擇「啟動合併列印」內的「標籤」
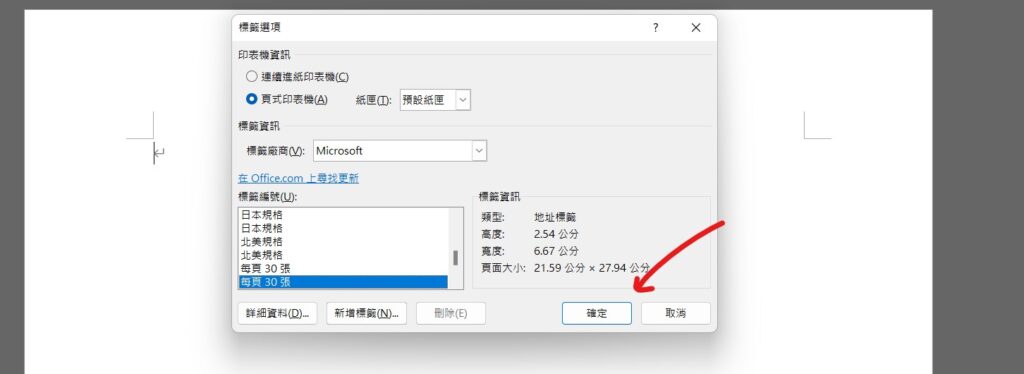
Step 2 選擇「標籤廠商」以及「標籤編號」後按下確定
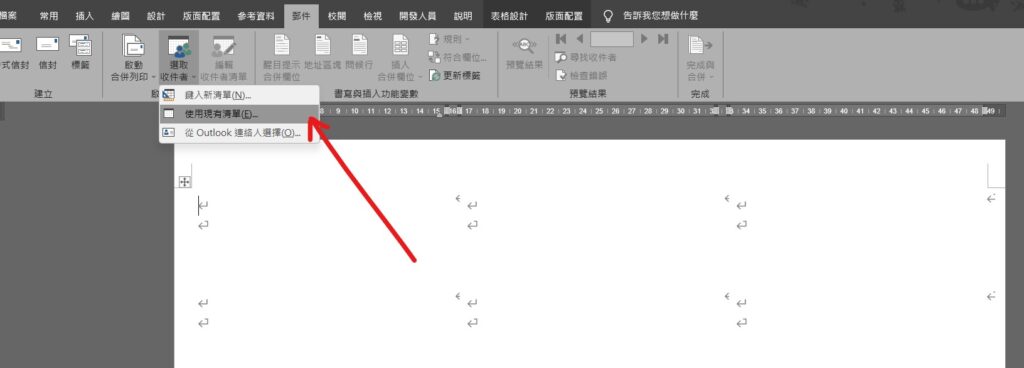
Step 3 在功能列「郵件」中啟動合併列印選擇「選取收件者」內的「使用現有清單」,若沒有收件者清單可以選擇「鍵入新清單」輸入收件者資訊
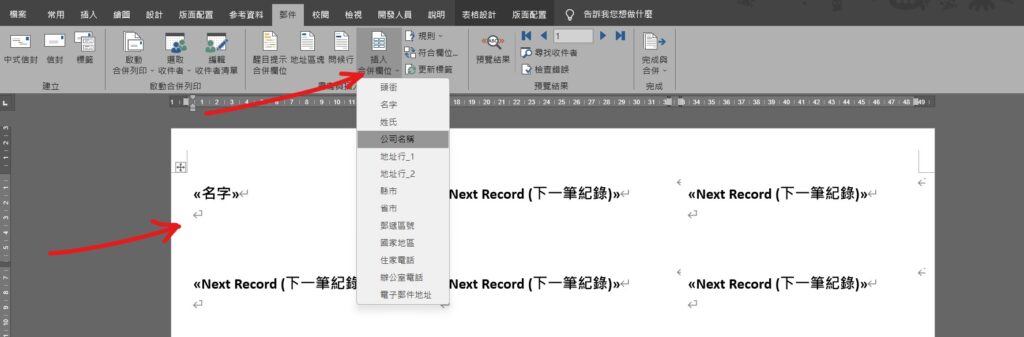
Step 4 在功能列「郵件」中書寫與插入功能變數選擇「插入合併欄位」內的標籤項目
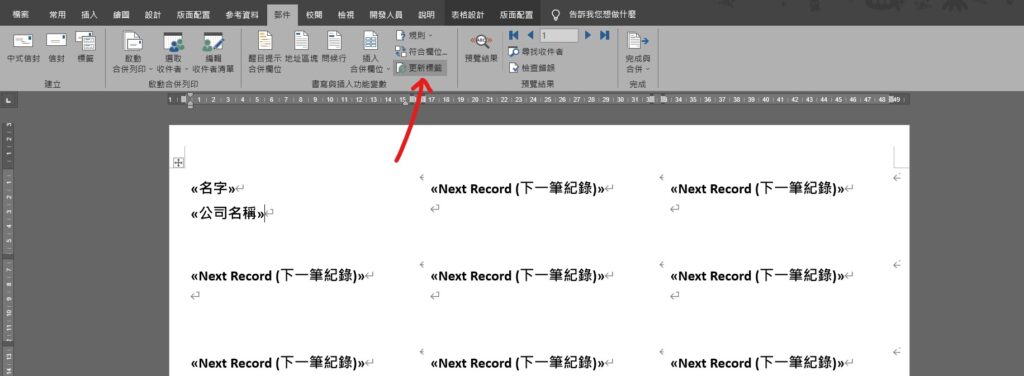
Step 5 在功能列「郵件」中書寫與插入功能變數選擇「更新標籤」

Step 6 在功能列「郵件」中預覽結果選擇「預覽結果」標籤即製作完成
【教學】Word 如何插入姓名標籤?跟著步驟馬上學會!