word 圖形smartart
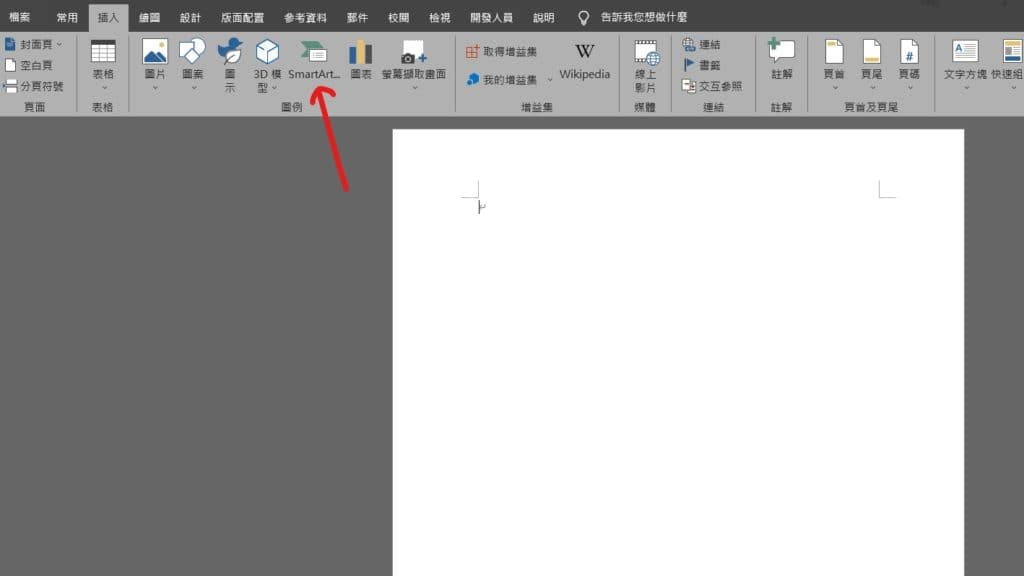
Step 1 在功能列「插入」中圖例選擇「SmartArt」
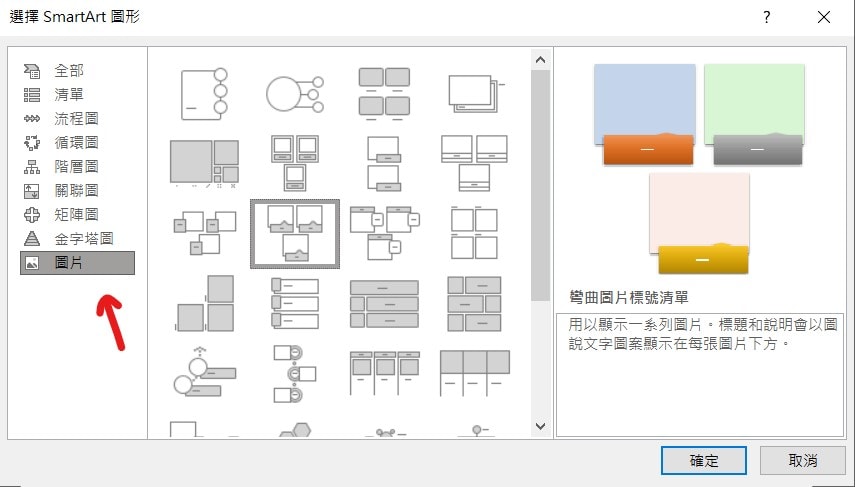
Step 2 在左邊欄位選擇「圖片」,並在右邊選擇想要顯示的樣式後按下「確定」
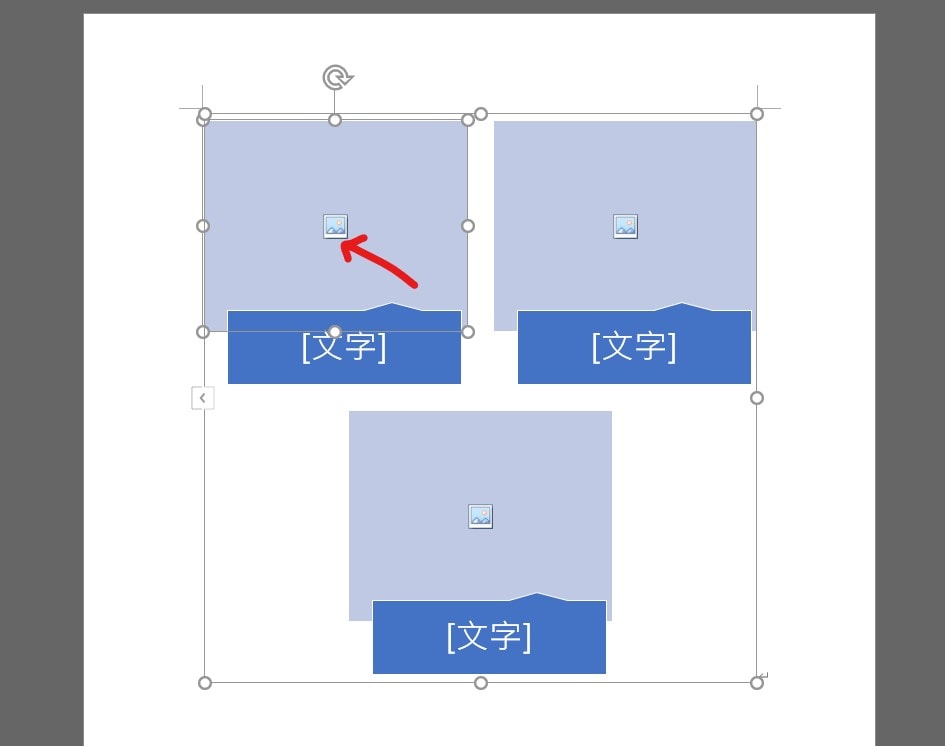
Step 3 分別點選小的圖片icon來選擇想要匯入的圖片
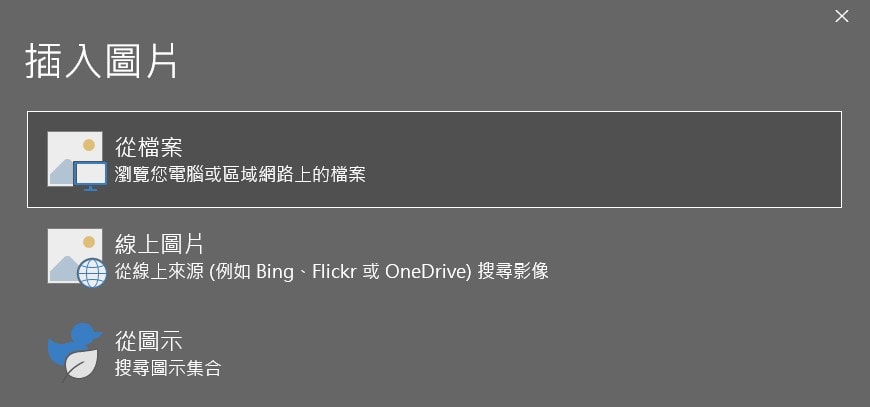
Step 4 可選擇「從檔案」、「線上圖片」、「從圖示」三種方法匯入圖片
Step 5 將各個圖片都匯入這樣就完成囉!
SmartArt預設數量不夠用要怎麼新增?點我看文章
【教學】Word 如何將圖片製作成SmartArt圖形?
A blog of my life

word 圖形smartart
Step 1 在功能列「插入」中圖例選擇「SmartArt」
Step 2 在左邊欄位選擇「圖片」,並在右邊選擇想要顯示的樣式後按下「確定」
Step 3 分別點選小的圖片icon來選擇想要匯入的圖片
Step 4 可選擇「從檔案」、「線上圖片」、「從圖示」三種方法匯入圖片
Step 5 將各個圖片都匯入這樣就完成囉!
SmartArt預設數量不夠用要怎麼新增?點我看文章